This is an old revision of the document!
Commodore 64C specific installation procedure
The Commodore 64C is defined as having one of the "narrow" boards AND the “flat” casing. This combination imposes additional, mechanical restrictions on how the BeamRacer can be installed as following the regular installation would typically lead to a situation where the computer casing could not be closed after the installation. To work this around we need to forfeit the additional “riser” socket in order to install the BeamRacer lower. For this to work well, a few components on the mainboard, especially the “C36” capacitor needs to be bent away to a horizontal orientation
When testing this approach we found that in some boards the capacitor C36 is loaded and soldered in a way, which prevents bending it away without damaging. Please DO NOT FORCE-BEND any of the components on your mainboard! If it can't be easily bent away, it needs to be re-soldered with enough play to allow it to be put horizontally over the mainboard. Seek trained technician help if you don't feel comfortable doing it yourself! We haven't yet seen a board where other components would need to be re-soldered to allow positioning them flat. Still – YMMV! Having that in mind, please make sure that none of the “C36”, “C37”, “C77” nor “Q3” components stand in the way before proceeding. Once you are 100% sure that no components stand in the way:
Installing BeamRacer board
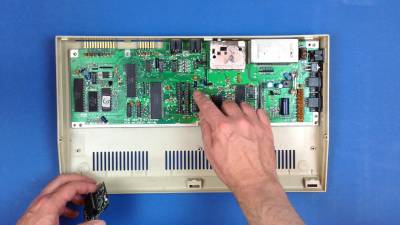
- Locate the orientation notches on both the VIC-II chip and the original socket on the mainboard1). In every Commodore 64C this should be at the far side, when the mainboard is placed in its normal, working orientation with connectors away from you and to the right
- Align orientation notches on the VIC-II/BeamRacer and the mainboard the same way
- Double-check that all pins on the BeamRacer board are completely straight.
- Place the BeamRacer board with its pins facing downward carefully on top of the original VIC-II socket, making sure that every single pin finds its way into respective original socket's opening
- Press the whole BeamRacer unit firmly, using two fingers, down. Be prepared to use sizeable force but stop and recheck everything (especially the underlying mainboard components!) if you feel that an excessive force is already at play. Please note that in most cases you won't be able to push the board into fully horizontal position before the BeamRacer and the “8701” integrated circuit mechanically contact each other. Do not force push any further once this is the case
VERY IMPORTANT – The two sockets MUST be 100% aligned. Inserting the BeamRacer unit misaligned can cause irreparable damage to your computer and/or BeamRacer!
Your BeamRacer is now installed and you can proceed to testing your installation

